
We all use audio files to record music, store voice notes, and preserve important conversations. Yet, sometimes these files refuse to play or suddenly go silent, which turns a valuable recording into useless data. Such corruptions in audio files can compromise sound quality and disrupt the whole project. Audio repair becomes necessary when these glitches affect important work.
This guide explores simple methods to fix damaged audio and shares tips to prevent future playback errors. As a bonus point, we’ll also introduce a reliable audio repair tool to fix your corrupted audio files without losing important content.
Part 1. Understanding Audio Repair: What it Means
Audio repair is the process used to identify and fix audio file problems, such as distortion or background noise. This technique aims to fix issues like a quick hum or interrupted playback to restore recordings so every note can be heard as originally intended. It also restores file integrity so recordings play smoothly without glitches or loss of sound.
This method works through software that scans sound waves and finds problems in the file. It removes noise, fixes volume issues, and rebuilds parts that are broken. Tools like noise reduction, equalizer correction, and de-clipping bring back clear and natural sound.
Types of Audio Problems
There are various problems that can make an audio file glitchy in its playback and sound quality.
-
Distortion: Unclear sounds and variation in tone that render the sound unpleasant to hear and difficult to comprehend.
-
Noise: The unwanted sounds in the audio that affect the original recording and make the audio harsh to hear.
-
Missing Segments: Audio file shows missing segments when the file transfer or render is interrupted due to connectivity issues.
-
Complete Corruption: When the file is unable to play because of malware or virus infection, it becomes completely corrupted.
Part 2. Why Do Audio Files Get Corrupted or Glitchy?
Now that we have explored the type of problems we face when the file is corrupted, let’s explore the reasons for audio glitch problems or corruption issues:
-
Interrupted Transfer Process: When audio files are interrupted during a transfer between a computer or external drive, they usually become corrupted.
-
Malfunctioning Storage Devices: Storage media like hard drives and USBs develop bad sectors due to age and internal damage, which makes the audio files unable to be read.
-
Program Failure or Crashes: If a program fails during the saving process, it will interrupt the writing process and leave the file structure broken.
-
Virus/Malware Infection: Some viruses modify the file headers and delete data blocks, which makes the audio files distorted or unplayable.
-
Inappropriate Conversion of Format: Encoding of audio into a different format using untrustworthy tools or wrong configuration may cause harm to the parameters of encoding.
Part 3. 6 Simple Methods to Fix Audio Files
Having discussed the reasons for corrupted audio files, let’s explore some easy audio repair methods to fix your damaged audio files.
Method 1. Use Dedicated Audio Repair Software - Repairit
The most reliable method for fixing a corrupt audio file is using a dedicated repair tool, and here, Repairit Audio Repair comes with advanced recovery solutions. It supports all professional or lossless audio formats, such as MP3, M4A, and AAC. This tool examines the damaged file and reconstructs the failed or warped audio portions with great precision.
Moreover, Repairit enables users to preview the repaired files prior to saving to ensure that the repaired output is correct. It helps in all the sounds of various origins, such as video records, voice records, and audio files downloaded. This tool is compatible with Windows and Mac, enabling users to safely repair extensive audio corruption without risking their original files or experiencing any quality loss.
Key Features
-
Batch Audio Processing: Allows users to import and repair multiple audio files simultaneously to save time.
-
Sample File Import: Users can add a sample audio file to set the desired volume and frequency for the repaired file.
-
AI Audio Restoration: Offers AI-powered high-precision restoration that delivers studio-grade audio quality during repairs.
Ultimate Guide to Fix Audio Files with Repairit Audio Repair
To look into the process that explains how to fix a corrupted file or audio glitch issue, go through the steps provided below:
Step 1. Access The Audio Repair Tool in Repairit
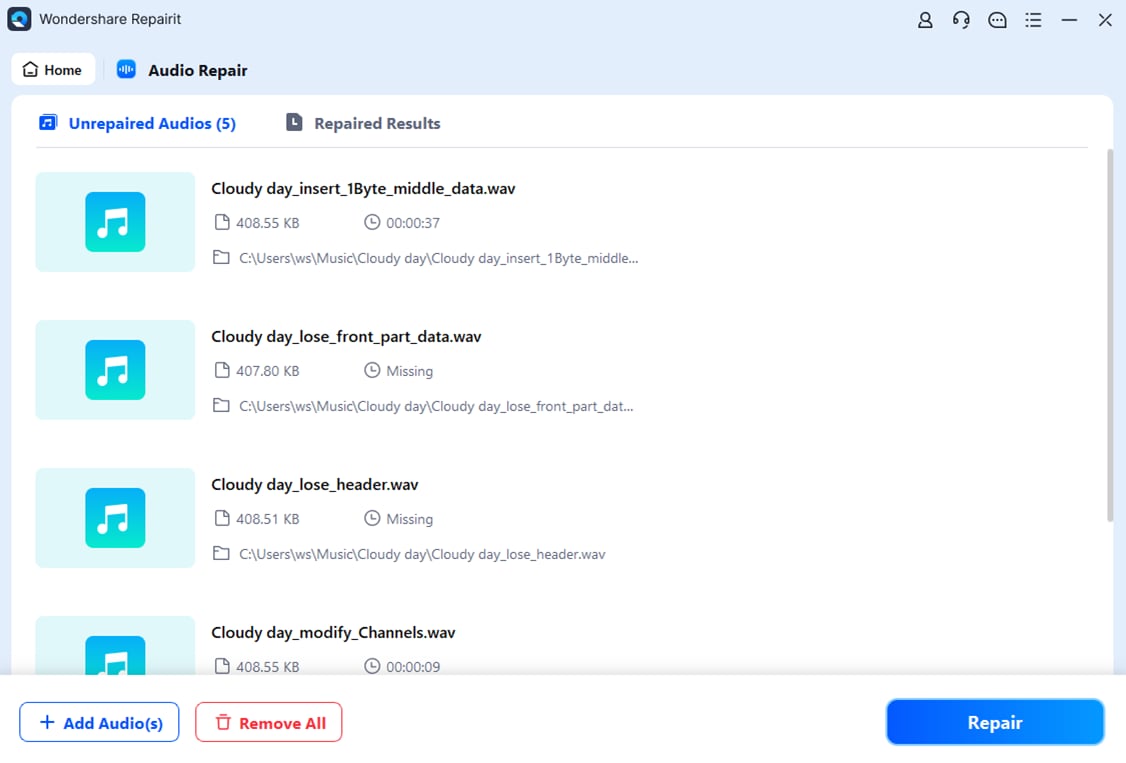
First off, select the “More Types Repair” section and hit the “Audio Repair” tool on the main interface. Next, import your corrupted audio files.

Step 2. Repair All Corrupted Audio Files
Once all files are imported, hit the “Repair” button to start the repair process.
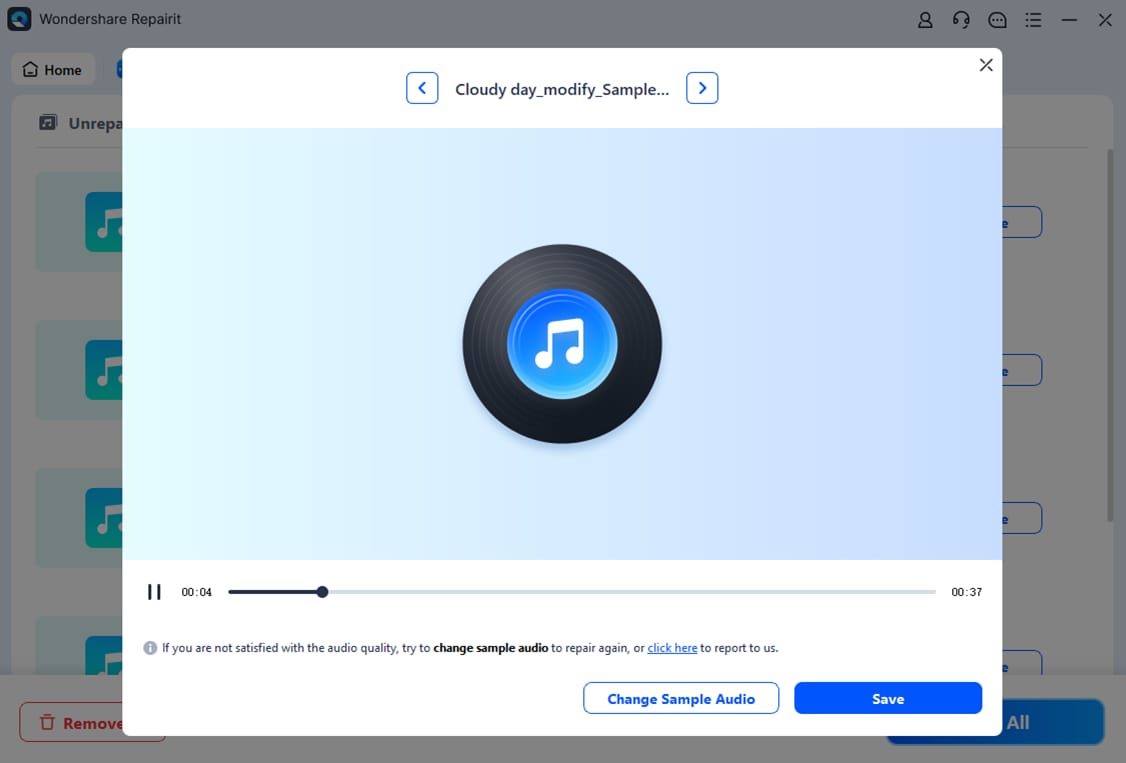
Step 3. Preview and Save Repair Audio Files
After your files are repaired, preview the output and hit the “Save” option to export fixed audio files.
Method 2. Convert Audio Files to a Different Format
Audio files fail to play because the original format becomes unreadable or incompatible with your player. Converting the audio file to another format can fix audio file issues by rewriting the file structure. You can convert your audio file formats using free programs such as VLC or online converters. Adhere to the guide below to repair audio files with VLC:
Step 1. Press the “Media” tab on the upper left corner and hit the “Convert/Save” option in the drop-down menu to import the corrupted audio file.
Step 2. Once the file is imported, select the desired file format and choose the destination. Next, hit the “Start” button, which will automatically save the converted file to the selected location.
Method 3. Repair with Open-Source Tools
Audio damage can be repaired with open-source programs, such as FFmpeg and MP3 Diags, which may re-encode damaged audio files or reassemble file headers. An example of this is MP3 Diags, which can remove the audio stream of a corrupted file and make it a new playable file. Here are the steps that you can follow to learn how to repair your audio file with MP3 Diags:
Instructions. Access MP3 Diags and hit the “Settings” icon to select the folder containing corrupted audio files. Once the folder scan is complete, the tool will show the corrupted files. Next, click on the “Hammer” icon and select the “Repair VBR Data” to repair the issues within audio files.
Method 4. Fix With Audacity
When audio files develop issues such as audio glitch problems or missing sections, Audacity serves as a free editor to fix them. Users can identify problem areas and apply repair filters to restore clarity. However, it struggles in repairing deeply corrupted audio files, as it mainly focuses on editing existing sound rather than reconstructing damaged data. Follow the instructions below to fix your audio:
Instructions. Import your audio files and select the audio that seems distorted. Next, hit the “Effect” tab and hover the cursor over the “Noise Removal and Repair” option, and click on the “Repair” button to fix the audio area.
Method 5. Use Adobe Audition Diagnostics
Adobe Audition has built-in diagnostic tools that are used to identify and fix problems, such as clipping or noise that is not wanted. This is appropriate for professionals who need the fine control of the waveform and might be less usable by beginners due to the learning curve. Now, let’s see how you can fix your audio files with this tool:
Step 1. Import your audio file and hit the “Windows” tab, then select the “Diagnostics” option to enable the feature.
Step 2. Select the “DeClipper” effect and hit the “Scan” option to detect the problems. Next, press the “Repair All” button to fix all the problems in the audio file.
Method 6. Use Fre:ac for M4A Files
The M4A files are easily corrupted during transfers or encoding, where Fre:ac works best to fix audio file problems. It re-encodes the M4A file as either an MP3 or a WAV file and recreates the file format to re-establish normal playback. Read the following instructions to understand how Fre:ac can assist you in solving this problem:
Instructions. Firstly, import your M4A file to Fre:ac tool and select the Encoder menu. Next, choose the desired file format to begin the conversion process. It will automatically save the converted file into the set location.
Part 4. Tips to Prevent Audio Glitches and File Damage
After exploring the top methods to audio glitch problems and file corruption issues, it’s important to know some tips that help your files stay away from damage.
-
Solid Storage Devices: Have your audio files stored in reliable and solid storage devices, since poor-quality storage devices may form bad sectors and corrupt your audio files.
-
Keep Regular Backups: Make multiple copies of your audio files on separate devices and cloud storage so you’ll be able to restore the file if one copy becomes damaged.
-
Avoid Forced Shutdowns: Do not power off your system during the recording or rendering process, as sudden power loss can leave files incomplete or corrupted.
-
Update Audio Software and Codecs: Make sure to update your audio software regularly to make it compatible with new formats and prevent playback errors caused by outdated tools.
-
Proper File Transfer: When moving files between devices, make sure to wait for the transfer to finish and use the safe eject option to avoid process interruption, which can corrupt audio data.
Conclusion
To conclude, this article covers the best audio repair methods for fixing corrupted and glitchy audio files. These methods help you restore your audio content and make it readable again, but manual methods often provide inaccurate results as compared to dedicated audio repair tools. Consider Repairit Audio Repair for a reliable solution that helps fix your audio file errors while maintaining file integrity.


